There is a reason green bean casserole shows up on American tables year after year: it is cheap, it feeds a crowd, and it hits the exact mix of creamy, salty, and crunchy that people want next to roast meat and mashed potatoes. A 9 by 13 inch pan serves 8 to 10 people, the whole thing costs around $8 to $12 depending on whether you buy fresh beans or canned, and most versions are in the oven in under 30 minutes of active work. The classic formula has barely changed since the 1950s: tender green beans folded into a creamy mushroom sauce, baked until bubbling, and finished with a thick layer of crisp fried onions. What has changed is how many good ways there are to get there, from a 10-minute shortcut version to a fully homemade bake that tastes noticeably richer.
This guide walks through 10 classic versions, one at a time, with real amounts, oven temperatures, and the small decisions that matter most. You will learn which beans to buy, how long to blanch them so they stay bright instead of turning soft and gray, why the topping goes on last, and how to make the whole pan a day ahead without losing the crunch. Every version below starts from the same base idea and changes one thing, so once you have made one pan, the other nine feel easy. Pick the version that fits your evening, and keep the rest for the next gathering.

A round white baking dish filled with baked green beans under a thick, golden layer of crisp fried onions, with creamy sauce showing at the edges. Photo: Wikimedia Commons.
Table of Contents
- 1. The Classic Canned-Soup Shortcut
- 2. The From-Scratch Phyllo Tart Twist
- 3. Fresh, Frozen, or Canned Beans
- 4. A Real Mushroom Sauce
- 5. The Crispiest Onion Topping
- 6. The Cheesy Parmesan Version
- 7. The Bacon Version
- 8. The Toasted Almond Crunch
- 9. The Fried Shallot Upgrade
- 10. The Make-Ahead Holiday Pan
1. The Classic Canned-Soup Shortcut

A serving of creamy green beans topped with crisp fried onions on a white paper plate. Photo: Wikimedia Commons.
This is the version most Americans grew up eating, and it is still the fastest route to a good pan: stir 2 cans (10.5 ounces each) of condensed cream of mushroom soup with 1 cup of milk, 1 teaspoon of soy sauce, and a pinch of black pepper, then fold in 4 cans (14.5 ounces each) of drained cut green beans or 2 pounds of thawed frozen beans, spread the mix in a greased 9 by 13 inch dish, and bake at 350°F for 25 minutes. Stir in 2/3 cup of canned fried onions, bake 5 minutes more, then scatter the remaining 2/3 cup on top and bake a final 5 minutes until golden. The whole pan costs about $8, serves 8 to 10, and takes roughly 10 minutes of hands-on time, which is why it survives on busy holiday schedules. The one rule that matters is to drain canned beans very well and to keep the last handful of onions for the very end, because onions added too early steam soft under the foil and the lid, and a soggy topping is the only real way to ruin this dish.
2. The From-Scratch Phyllo Tart Twist

A rectangular phyllo tart layered with green beans and topped with crisp fried onions on a white platter, a dressed-up twist rather than the classic baked dish. Photo: Wikimedia Commons.
If you want the same flavors in a prettier package for a smaller table, bake the beans as a tart: brush 8 sheets of thawed phyllo pastry with 4 tablespoons of melted butter, layer them in a rimmed baking sheet, and fill the center with 1 pound of blanched green beans tossed in a simple cream sauce made from 2 tablespoons of butter, 2 tablespoons of flour, and 1 cup of half-and-half, then top with 1 cup of fried onions and bake at 375°F for 20 to 25 minutes until the pastry is deep golden and the filling bubbles. The phyllo adds a flaky, buttery crunch that the classic soft topping does not have, and the flat shape means every serving gets topping, which is the part everyone fights over. It serves 6 rather than 10, costs about $10, and needs a gentle hand with the pastry, since torn sheets still bake fine but dry sheets crack, so keep the stack covered with a damp towel while you work. Cut it with a sharp serrated knife after a 10-minute rest, and serve it the same day, because phyllo softens overnight in the fridge.
3. Fresh, Frozen, or Canned Beans

A pile of fresh raw green beans in a wooden crate, the starting point for the best-textured version. Photo: Wikimedia Commons.
The bean you choose changes the texture more than any other decision, so buy with a plan: fresh beans give the firmest bite and the brightest color, but they need trimming and a 5-minute blanch in salted boiling water followed by an ice bath, and 2 pounds of fresh beans trim down to about 1 3/4 pounds; frozen beans are the best middle ground, since they are already cut and blanched, so just thaw 2 pounds, pat them dry with towels, and skip the boiling step entirely; canned beans are the softest and saltiest, so drain 4 cans well, rinse them once if you want less salt, and cut the added salt in the sauce by half. Fresh beans cost about $2.50 a pound in most US supermarkets, frozen about $1.50 a bag, and canned about $1 a can, so the fresh version runs only $2 to $3 more for a noticeably better result. Whichever you pick, never boil the beans until fully soft before baking, because they cook another 25 minutes in the oven, and beans that start soft end up mushy and dull.
4. A Real Mushroom Sauce

Golden chanterelle mushrooms frying in a large pan; the photo shows a fancier mushroom than the usual button kind, but the cooking rule is the same. Photo: Wikimedia Commons.
A homemade sauce is what separates a good pan from a forgettable one, and it takes only about 15 extra minutes: melt 3 tablespoons of butter in a large skillet, cook 1 pound of sliced cremini or button mushrooms with 1/2 teaspoon of salt over medium-high heat for 6 to 8 minutes until they release their liquid and the pan goes dry again, then stir in 2 minced garlic cloves for 1 minute, sprinkle in 3 tablespoons of flour, cook 1 minute more, and whisk in 1 1/4 cups of low-sodium chicken or vegetable broth plus 1 cup of half-and-half, simmering 3 to 4 minutes until thick enough to coat a spoon. The key step is waiting for the mushrooms to brown rather than rushing them, because pale, steamed mushrooms make a thin, gray-tasting sauce, while well-browned ones give the deep savory flavor that canned soup imitates. Season in layers, a pinch of salt with the mushrooms and another taste once the sauce thickens, and add a splash of Worcestershire sauce or a pinch of smoked paprika if the sauce tastes flat. Like the creamy base in our lasagna soup guide, this sauce should be thick before the beans go in, since a thin sauce never thickens properly in the oven.
5. The Crispiest Onion Topping

Crisp baked onion rings piled on a yellow tray; these are full rings, not the fine fried topping, but they show the golden crunch to aim for. Photo: Wikimedia Commons.
The topping is the whole reason people reach for seconds, so treat it as its own recipe rather than an afterthought: for the homemade route, soak 1 thinly sliced large onion in 1 1/2 cups of buttermilk for 15 minutes, toss the slices in 1 cup of flour mixed with 1 cup of panko breadcrumbs and 1 teaspoon of dried herbs, then fry in 2 inches of oil heated to 375°F until deep golden, about 2 to 3 minutes per batch, and drain on paper towels. If you use the canned kind, which most cooks do, buy 1 can (6 ounces) and keep it sealed until baking time, since the onions go soft within an hour of opening in a warm kitchen, and add half into the bean mix and the rest only in the last 5 minutes of baking. Either way, serve the pan within 20 minutes of leaving the oven, because steam is the enemy of crunch and a covered pan left sitting will soften even perfect onions. Budget about $3 for the canned version or $2 plus oil for homemade, and make a little extra, since a small bowl of spare onions on the table always disappears first.
6. The Cheesy Parmesan Version

A small pile of finely grated Parmesan cheese on a gray surface, ready to stir into the sauce. Photo: Wikimedia Commons.
Cheese belongs in this dish in a supporting role, not as the main event: stir 1/2 cup of grated Parmesan into the hot mushroom sauce just before adding the beans, and sprinkle another 1/4 cup over the top with the final onions, which gives a salty, savory depth without turning the pan into a cheese bake. If you want a meltier version, use 1 cup of shredded Gruyere or sharp cheddar instead, but keep the total at 1 to 1 1/2 cups, because more cheese makes the sauce greasy and hides the beans, and add it off the direct heat so it melts smoothly instead of clumping. Bake exactly as the classic version at 350°F for 25 to 30 minutes, and watch the top in the last 5 minutes, since cheese browns faster than plain onions and can go from golden to dark in a minute. This version costs about $3 more than the plain one and is the best choice when kids are at the table, since the familiar cheese flavor wins over picky eaters who might otherwise skip the beans. The same from-scratch logic that makes homemade sauces worth the effort is covered in our foods worth making from scratch guide, where a simple sauce beats the canned version on both taste and price.
7. The Bacon Version

Strips of bacon frying and bubbling in a pan, cooked until crisp before they ever touch the beans. Photo: Wikimedia Commons.
Bacon adds a smoky, salty punch that suits this dish better than almost any other add-in, but it must be fully crisp before it goes near the pan: cook 6 slices of bacon in a skillet over medium heat for 8 to 10 minutes until deep golden, drain on paper towels, and crumble, then stir half into the bean mix and save half for the top with the final onions. Do not use soft or half-cooked bacon, because it turns chewy in the creamy sauce and drags the whole dish down, and do not pour the bacon fat into the sauce unless you cut the butter by the same amount, or the pan turns greasy. A pound of bacon costs about $5 to $7, and 6 slices is plenty for a full pan, so this version adds roughly $3 and a lot of flavor for little money. It pairs best with the from-scratch mushroom sauce, since the smoky bacon and browned mushrooms build on each other, and it is the version to make when the table includes meat lovers who might otherwise treat a vegetable side as an afterthought.
8. The Toasted Almond Crunch

A close pile of pale sliced almonds, the topping for a lighter, nutty crunch. Photo: Wikimedia Commons.
For a lighter crunch that skips the fried topping entirely, use toasted almonds: spread 3/4 cup of sliced almonds on a dry baking sheet and toast at 350°F for 5 to 7 minutes, shaking once, until they smell nutty and turn pale gold, then cool them fully before scattering over the baked beans just before serving. Almonds cost about $2 for the amount you need, and they stay crisp far longer than fried onions, which makes this the best version for a buffet where the pan sits out for an hour. The flavor is quieter and nuttier than the classic topping, so add 1 tablespoon of lemon juice and 1 teaspoon of lemon zest to the sauce to keep the dish bright, and warn guests about the nuts, since this is the one version that is not safe for everyone at the table. Toast the almonds no more than a day ahead and store them airtight at room temperature, because toasted nuts go stale fast in the fridge, and never add them before baking, since 25 minutes in a wet sauce turns them soft and defeats the point.
9. The Fried Shallot Upgrade
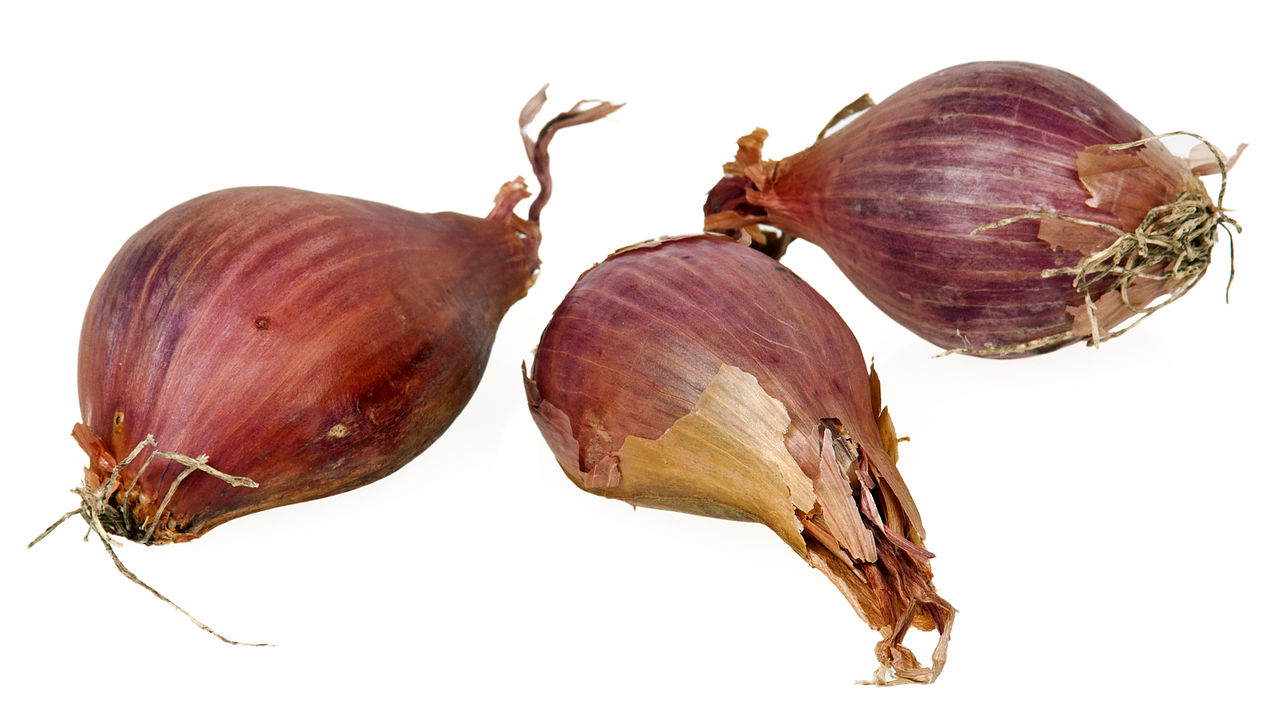
Three whole shallots with reddish-purple skins on a white background, shown before peeling and frying. Photo: Wikimedia Commons.
Shallots are the cook's upgrade to the classic topping: they fry up sweeter and more delicate than onions, with a fine, lacy crunch that looks beautiful on the finished pan. Slice 4 large shallots into thin rings, toss them in 1/4 cup of flour with a pinch of salt, and fry in 1 inch of oil at 350°F for 2 to 3 minutes per batch until light golden, then drain on paper towels and season with a little extra salt while hot. The catch is timing, because shallots go from golden to burnt in under a minute, so fry them in small batches, lift them out while they still look a shade pale, and let them crisp as they cool. Shallots cost about $1.50 for the batch, roughly the same as canned onions, and the result tastes noticeably more refined, which makes this the version to choose for a dinner party rather than a big family crowd. Use them exactly like the classic topping, half stirred in and half on top in the last 5 minutes, and keep a few extra aside, since guests will pick at them straight from the pan.
10. The Make-Ahead Holiday Pan
A full holiday dinner table loaded with roast turkey, mashed potatoes, gravy, and many side dishes; the baked bean dish is just one of many plates here. Photo: Wikimedia Commons.
The make-ahead plan is what saves this dish on a holiday, when the oven is already full: assemble the beans and sauce in the baking dish up to 24 hours ahead, cover tightly, and refrigerate, but store the onion topping separately in an airtight container at room temperature, and add it only in the last 5 minutes of baking. On the day, take the dish out of the fridge 30 minutes early so it is not ice cold, bake covered at 350°F for 25 minutes, then uncover, add the topping, and bake 10 to 15 minutes more until bubbling at the edges, adding about 10 minutes to the usual time to make up for the cold start. Leftovers keep 3 days in the fridge in an airtight container, and the best way to reheat them is covered in a 350°F oven for 15 to 20 minutes with a splash of milk to loosen the sauce, then a fresh handful of onions on top for the last 5 minutes. Do not freeze the finished pan, since the sauce separates and the beans go soft on thawing, and if you need a second pan for a crowd, make it fresh rather than doubling one dish, because a doubled pan bakes unevenly. If you are building a whole party spread around this pan, our fall appetizer ideas list pairs well with it, since small bites before dinner let the main side stay the star.
Frequently Asked Questions
Can I make this dish the day before?
Yes. Assemble the beans and sauce up to 24 hours ahead, cover, and refrigerate, but keep the onion topping sealed at room temperature and add it only in the last 5 minutes of baking, adding about 10 minutes to the bake time for the cold start.
Why did my pan turn out watery?
The usual cause is wet beans or a thin sauce. Drain canned beans well, pat thawed frozen beans dry, and make sure the homemade sauce thickens enough to coat a spoon before the beans go in, since a thin sauce will not thicken much in the oven.
Can I use fresh beans instead of canned?
Yes, and they taste better. Trim 2 pounds of fresh beans, blanch them 5 minutes in salted boiling water, shock them in ice water, and drain well before folding them into the sauce.
How do I keep the onion topping crisp?
Add the final onions only in the last 5 minutes of baking, serve within 20 minutes, and never cover a hot pan with foil, since trapped steam softens the topping fast.
How long do leftovers last?
Leftovers keep 3 days in the fridge in an airtight container. Reheat covered at 350°F for 15 to 20 minutes with a splash of milk, and add fresh onions on top for the last 5 minutes.
Final Thoughts
The best version of this dish is the one you will actually make, and for most cooks that means starting with the classic shortcut pan, learning how the beans and sauce should look, and then trying the from-scratch sauce when you have an extra 15 minutes. Fresh beans, well-browned mushrooms, and a topping added at the very end are the three habits that lift every version, no matter which topping or cheese you choose. Keep the pan simple, serve it hot, and make a little extra topping, since that is the part everyone asks about.
Once you have one good pan under your belt, the variations here give you a full year of options, from the bacon version for meat lovers to the almond version for a long buffet. Buy the beans a day early, prep the sauce while the oven heats, and let the dish rest 5 minutes before serving so the sauce sets. A humble vegetable side rarely earns this much praise, but this one does, every single time.
Sources
- Simply Recipes: From-Scratch Version
- Eatwell101: Classic Recipe and Tips
- Aura Decor Living: Lasagna Soup Guide
Gallery

A close view of a phyllo tart with green beans and crisp fried onions. Photo: Wikimedia Commons.

The same phyllo tart seen from a different angle, with its flaky golden edges and onion topping. Photo: Wikimedia Commons.

A large pile of fresh green beans, the raw ingredient behind every version in this guide. Photo: Wikimedia Commons.

No comments:
Post a Comment